Make Plantable Seed Paper From Junk Mail: A Crafty Way to Grow Beauty from Trash
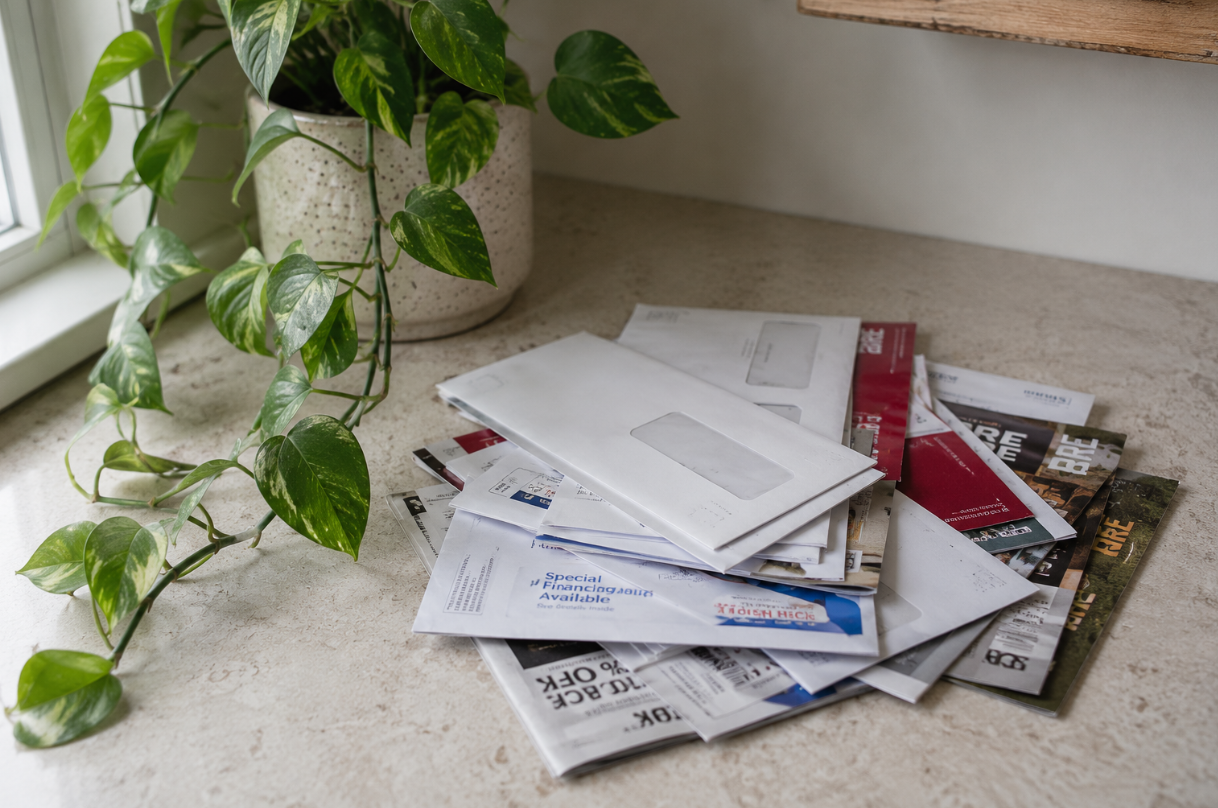
There is something satisfying about tearing into junk mail, but maybe that’s just my anger-issues talking. Those clunky catalogs you didn’t ask for, the fake credit card offers (do any of those out there actually work?), or the glossy pages screaming SALE SALE SALE like carnival barkers trying to shout their way into your dopamine receptors. Not today, mail!
But what if I told you that all that paper you usually toss into the recycling bin could become a canvas for new life? Instead of landfill or even compost, it could transform into wildflowers and fresh herbs? You could quite literally turn garbage into green if you have some patience and time on your hands.
Welcome to the dopamine hobby of making plantable seed paper from junk mail.
It’s meditative, it’s incredibly messy, it’s imperfect, and it leads to beauty…eventually. Like most good things.
Why It’s a Dopamine Hobby
First before I get into the “how”, I want to be clear that dopamine isn’t about pleasure and never was, it’s about pursuit and always was. Dopamine is about getting your hands dirty, following curiosity, and watching something come to life over time.
This project delivers on all fronts from ripping up junk mail satisfies that destructive itch (rip therapy is real, especially when mad or frustrated) to blending pulp and pressing paper gives you tactile feedback…squishy, squelchy, a little chaotic.
Sprinkling seeds in your handmade sheets feels like you’re tucking tiny secrets into pages and as a plant enthusiast…I’m here for it.
Drying and decorating engages your aesthetic side and if you’re more artistic than I am (I hope you are), you can make something really beautiful and cool. Planting them later offers delayed joy…flowers from a letter you never wanted, I mean, come on. What’s better than that?
It turns passive trash into active art and gives a second life to things designed to be ignored. There’s an aliveness to that, a spark that makes you feel like maybe the world isn’t such a lost cause after all.
Supplies You’ll Need
Most of this can be found around your house or sourced sustainably.
Junk mail (the non-glossy kind works best)
A blender (secondhand or dedicated for crafts because you don’t want to use the same one you use for your husband’s protein smoothies)
Warm water and a large basin or tub (bucket works just as well)
A mesh screen or deckle (you can DIY this with old picture frames and window screen)
A sponge
Tea towels or felt
Seeds (wildflowers, herbs, pollinator blends, etc.)
Optional: food coloring, dried petals, essential oils
Step-by-Step Instructions
1. Sort Your Paper
Not all junk mail is created equal. Avoid plastic-coated pages, glossy magazine paper, and anything with metallic ink. These aren’t really good for the environment and I also don’t know if it can kill the seeds before they’re even planted. Look for plain white or colored paper, that’s your best bet.
Tear it into small pieces…about 1-inch squares. The more colors, the more confetti-like your final paper will look. Oh, and remove any of those little plastic windows.
2. Soak the Paper
Place your torn paper in a large bowl or tub and cover it with warm water. Let it soak for at least 30 minutes. Overnight is even better if you want a smoother pulp. Patience is key!
3. Blend the Pulp
Take a few handfuls of soaked paper and toss them into a blender with about 2 cups of water. Blend until you get a chunky oatmeal-like consistency. You can add food coloring here if you want to tint your paper. Pink is my favorite to do!
Repeat until all your soaked paper has been blended.

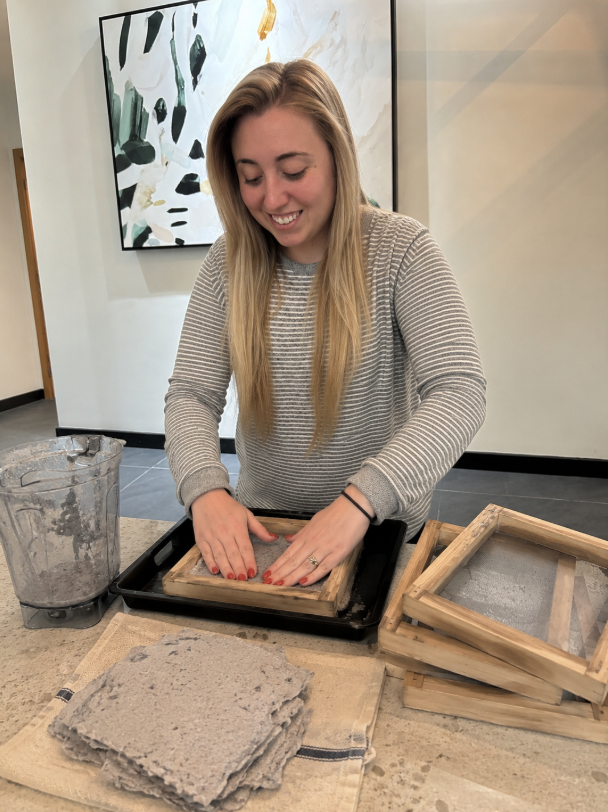
4. Set Up Your Mold & Deckle
If you’re using a DIY screen, place it over your tub or sink. Pour your pulp over the screen and spread it evenly with your hand or a spatula. Try to keep it about ¼ inch thick.
This part doesn’t have to be perfect. In fact, the imperfect edges and texture are part of the charm.
5. Sprinkle in Seeds
Now the magic happens. Gently sprinkle your chosen seeds across the wet pulp. Press them lightly into the surface…just enough to embed them, but not so much that they sink out of sight.
Good options include wildflower mixes, basil, dill, thyme, lavender, milkweed (for monarch butterflies), and chamomile.
Avoid seeds that are super tiny or that need light to germinate. Also avoid the big clunkers. Those peas are not it for this project, trust me.
6. Press and Blot
Lay a tea towel or piece of felt over your pulp. Use a sponge to press and absorb any excess water. You can also sandwich your pulp between two towels and gently roll over it with a rolling pin.
This step helps bind everything and makes your paper thinner and more uniform.
7. Dry Completely
Leave the paper to dry flat in a warm, dry area. You can dry it in the sun (as long as it’s not too hot or windy), or indoors on a flat surface.
This can take 1-2 days depending on humidity. I err on the side of caution and leave it for at least two days.

8. Peel and Trim
Once dry, gently peel the paper off your screen or towel. Use scissors to trim ragged edges if you like, or leave them wild.
I saw something online that said you can iron gently on low (no steam) between parchment paper to flatten further. I never did that because of…I worried about my little seeds, but it’s possible if you want to try.
9. Use or Gift
Your plantable seed paper is ready! Use it to make gift tags, greeting cards, wedding favors, garden markers, handmade journals (that’s another even harder thing and then I’m not sure how you’d plant it, but oh well), or Earth Day crafts with kids. It’s a super messy process so be aware you’ll be needing a good cleanup after.
Include a little note: "Plant me!"
You can add dried flower petals for a romantic, botanical look or even layer colors to create marbled effects. Stamp or stencil with eco-friendly ink because don’t forget the end goal is to put it in the ground. Tear into shapes like hearts, moons, and stars roughly or cut with scissors.
Include poetry in faded ink before pulping if you want to work on your manifestation.
You can also write messages on the finished paper with a pencil or waterproof ink. When planted, your letter returns to the soil. Now, that’s the kind of poetic closure dopamine loves.
Modern life has made paper disposable, ignorable. When you create it yourself, especially with the soft chaos of junk mail and seeds, it becomes sacred again. What emerges at the end is a future garden disguised as a letter.
In a world rushing toward digital everything, handmade paper reminds us that slowness is a language too. You don’t need perfection, it’s totally okay if your paper comes out lumpy and weird.
That’s what makes it a dopamine hobby…not the outcome, but the process of touching the past while sowing something new.
Best Seeds to Use for DIY Plantable Paper Projects
Not all seeds are equal in their paper lives. Some thrive when embedded in pulpy sheets…others sulk. For a seed paper that’s both beautiful and functional, choose small, flat seeds that don’t need deep soil.
Think wildflowers: black-eyed Susans, poppies, cosmos, forget-me-nots.
Or culinary herbs like basil, dill, thyme…tiny green promises tucked into confetti.
Avoid anything large, woody, or slow to sprout. This isn’t the place for avocados or peonies. Let the paper stay soft, light, and crinkled like old maps.
You want the seeds to breathe, not fight for freedom. This kind of knowledge (this little trial-and-error wisdom) is part of the dopamine dance. You learn by feeling your way forward, and each successful sprout is a joyful little secret you get to keep (or gift).
It seems small, right? Turning junk mail into pulp and pressing that pulp into soggy sheets. The thing is, every piece of recycled paper means one less tossed envelope, one less landfill layer.
Every embedded seed means fewer plastic seed packets, fewer impulse garden-store purchases wrapped in shiny, coated waste. When you make something instead of buying it, you shift the balance…less carbon, less shipping, fewer factory floors. The dopamine here is also from knowing you took something broken and made it bloom.
One project won’t save the world, but thousands of tiny acts of restoration? That’s how gardens, movements, and hope all begin.
Troubleshooting Tips
Paper too thick? Add more water when blending.
Seeds falling out? Sprinkle before pressing, not after.
Tearing during removal? Let it dry longer or use a firmer screen.
Mold forming? Use thinner sheets and ensure airflow during drying.
Dopamine Hobbies to the Rescue
In a world where most things are designed to be disposable, seed paper is the ultimate trick. It shows you that even something as unwanted as junk mail can be beautiful. Growth can come from what was once unwanted.
I made this, and soon, it will bloom. What a lovely feeling.
This is the heart of a dopamine hobby, not just doing for the sake of doing, but doing for the sake of becoming.
So next time you pull a pile of junk mail from your box and feel that flicker of irritation, smile instead. You’re not getting spammed, you’re getting raw material for beauty, creativity, and for joy you can actually plant.
If you’re tired of getting junk mail, you can sign up for my Sommelier Snail Mail program! It’s a cute written letter every month that teaches you about wine in a fun and not-intimidating way. You can sign up here!
Related Reads on Dopamine Hobbies:
Try this Wildflower Seed Mix from Amazon for a vibrant, bee-friendly paper batch. Pro tip: don’t try seeds that are too large. I learned my lesson with the sunflowers.