A Tiny Sealed Under-the-Sea World: How to Make a Mini Fish Terrarium (No Real Fish, All the Charm)
Before we start, let’s clear the air (or in this case, the “water”), we aren’t keeping actual fish in a jar here.
We love fish too much to trap them in a pint-sized apartment with no oxygen or snacks. This is about creating a sealed decorative terrarium that looks so much like an underwater scene that you’ll do a double take…every single time you pass it.
It’s like the snow globe’s breezy cousin who decided they’d rather live in a seaside apartment instead of a winter village.
The best part is no water changes or filters and no, “oh no, I forgot to feed you.” I had pet frogs and fish growing up and the water changes were the worst. Man, those things always ended up smelling so badly.
This is a true slow dopamine craft: a small, low-effort, high-payoff object that your eyes can rest on whenever life gets loud.
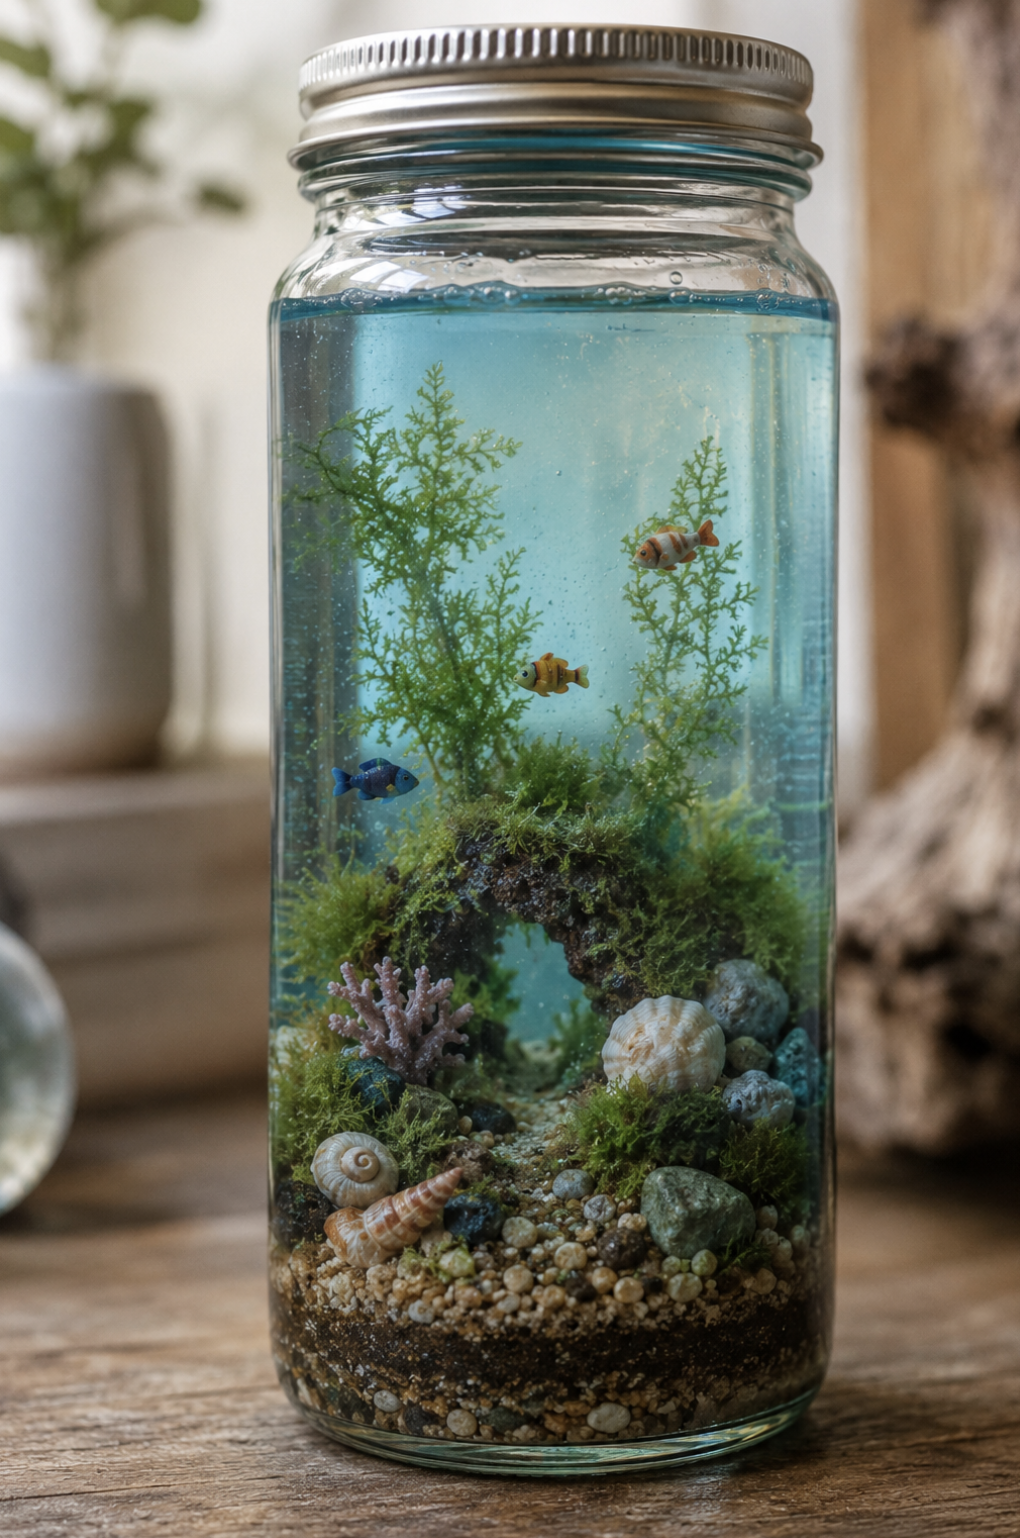
Step 1: The Jar is Everything (Choose Wisely)
Pick a jar you like looking at even when it’s empty.
I’m partial to short and squat spice jars that make the “sea” feel cozy or tall and thin jars that feel like a deep dive. Apothecary jars with chunky glass lids are extra dramatic and fun too. Just be sure not to pick mason jars with too much decorative ridges and stuff to them. While those are cool when you’re using them, they sort of distort your little aquarium. Although…maybe it’ll be fun, who knows? Try what you will.
The jar is the first moment of dopamine in this whole process because you’re already building anticipation just by choosing it.
Hold it up to the light, tilt it, and imagine what tiny fish would see if they lived there. If the jar doesn’t make you smile empty, it won’t magically become exciting full. Also yes, I tend to find joy in little things like jars.
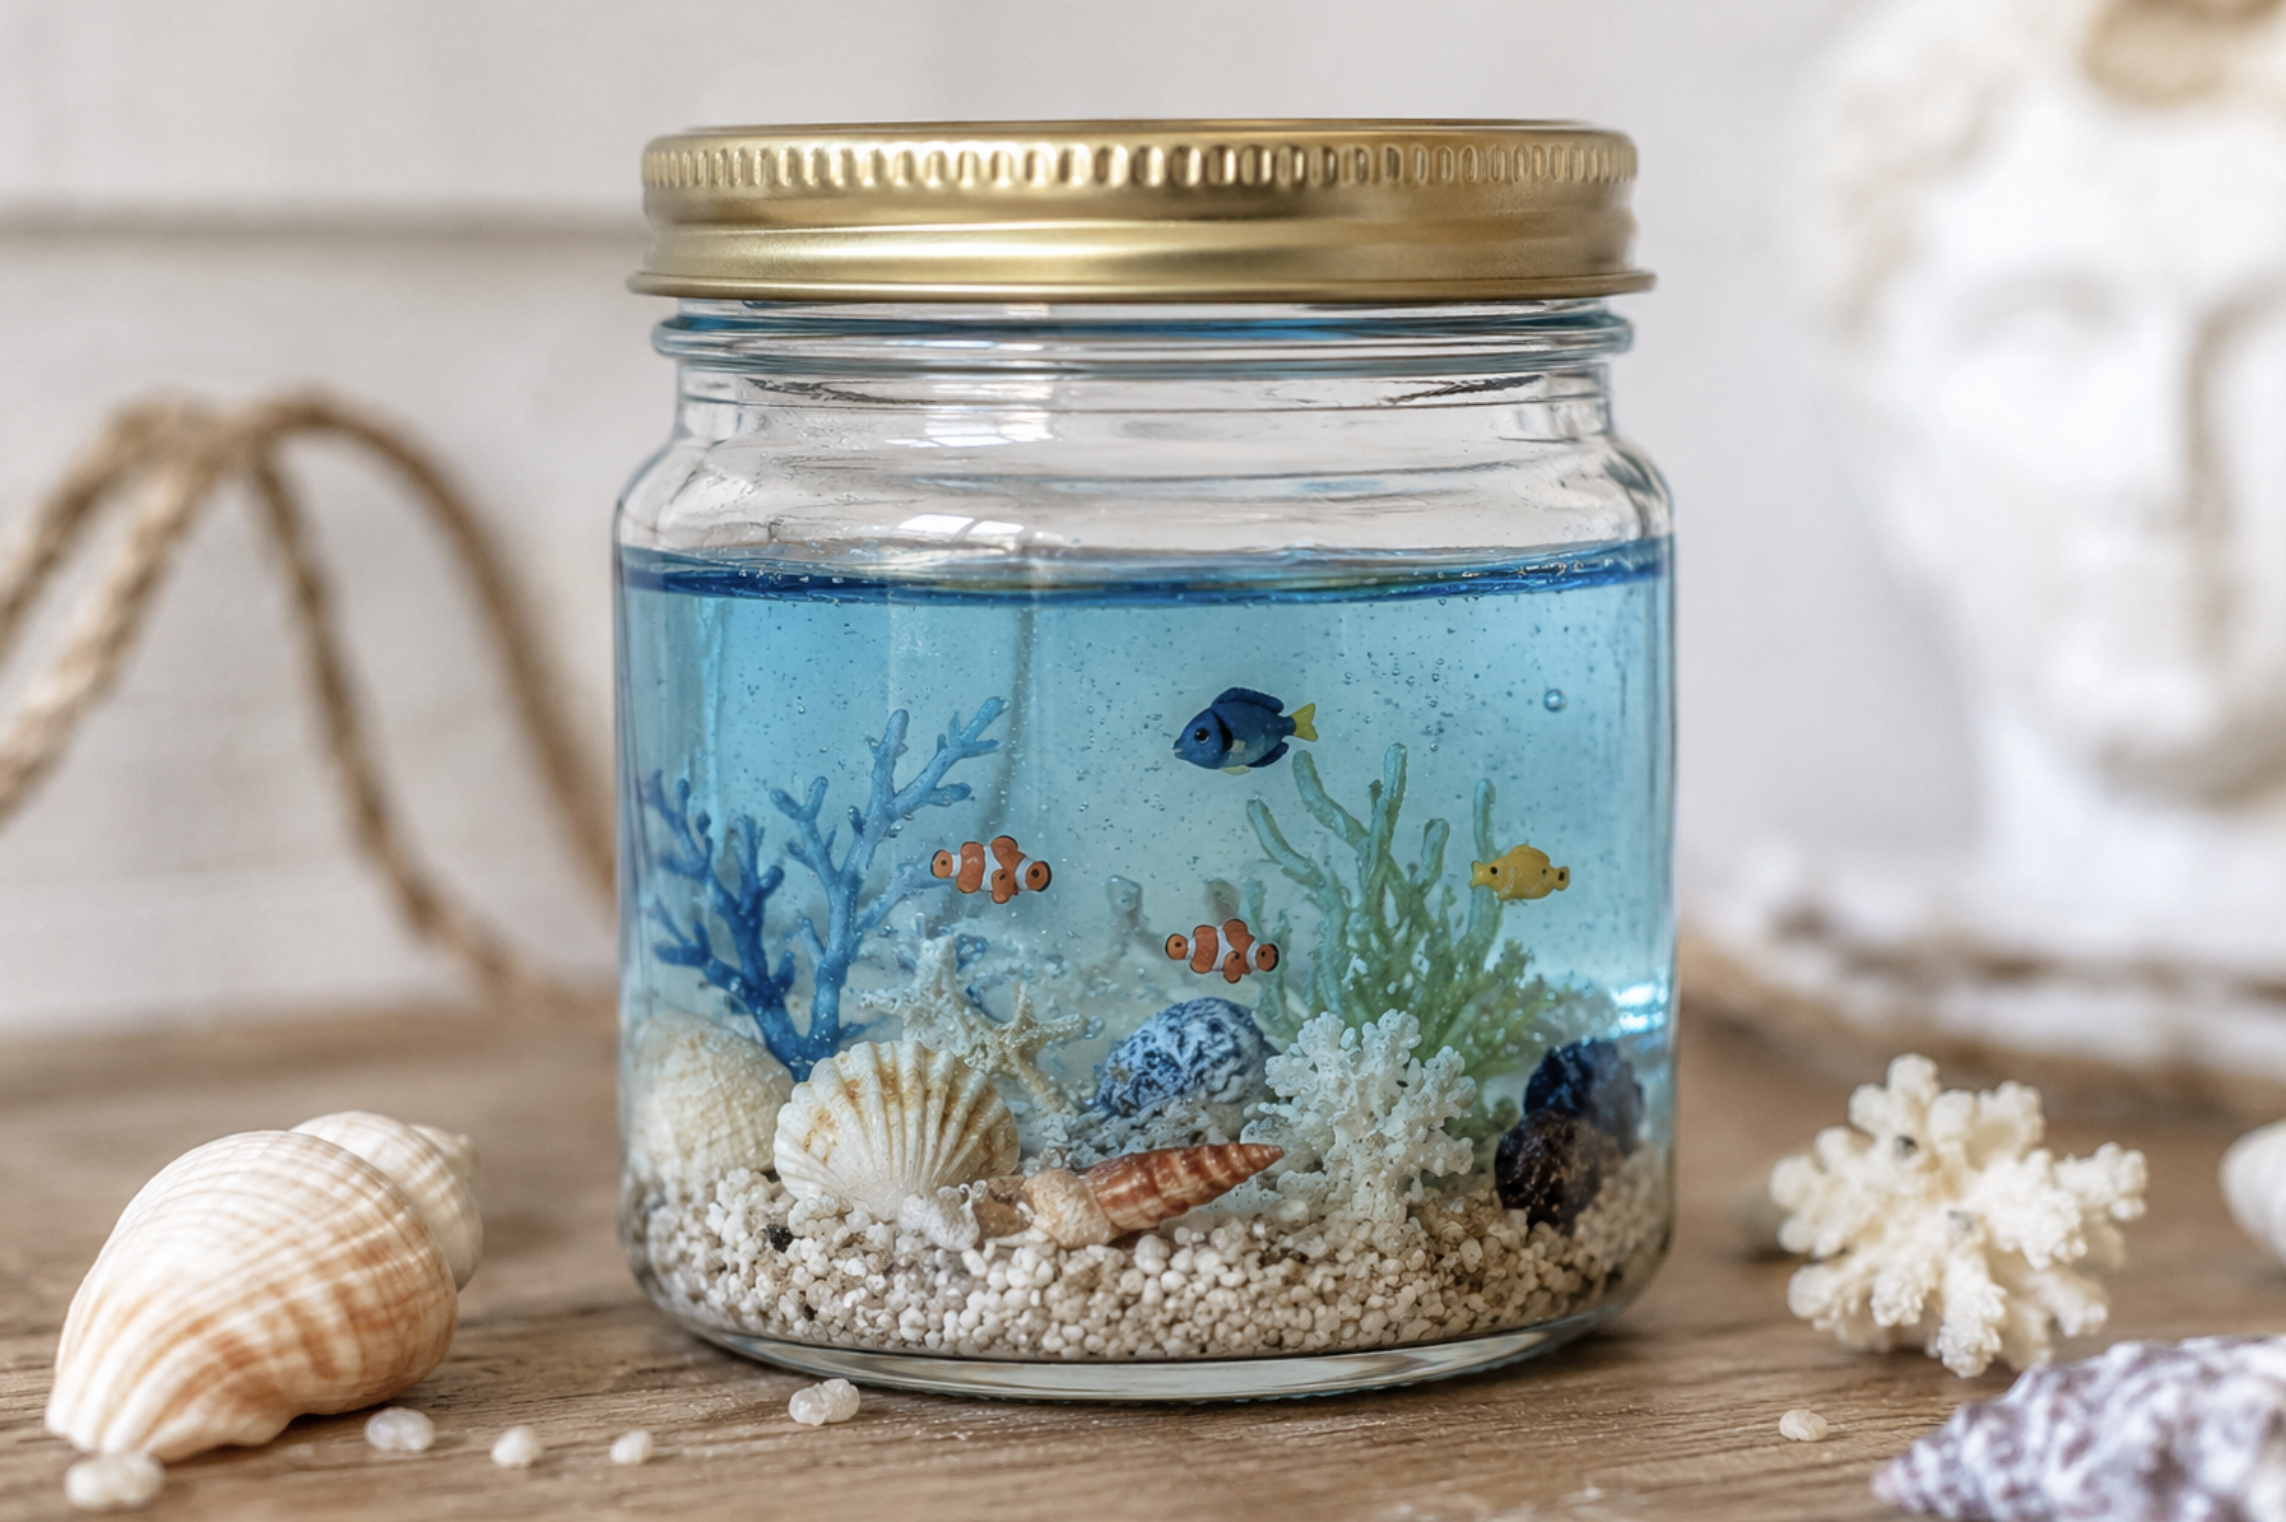
Step 2: Build Your Ocean Floor (Pebbles, Sand, or “Vacation Souvenirs”)
Pour in a small layer of pebbles, aquarium gravel, or craft sand. If you’re like me and have a stash of random shells from a “I’ll totally make something with these” phase, now’s their moment to shine! Especially because on trips to beaches I always seem to end up with more shells to take home then put in my plant pots.
Here’s the trick though, keep it uneven. Hills and dips are more interesting than a perfectly flat bottom to look at later. Let some of the bigger shells lean against the glass so they’re visible from the outside, and if you’re using sand, press down a few “paths” with the back of a spoon…instant depth.
This is your chance to play set designer for fish who will never complain about rent (the best kind of tenants).
Step 3: The Secret Greenery (Moss, Plants, and Mini Coral)
Fake moss works beautifully here.
The trick is to cut or tear it into tiny, imperfect tufts so it looks like something that grew there naturally instead of being stuck there.
You can get preserved moss at most craft stores, or cheat like I do sometimes and trim a bit of green felt into wobbly shapes. Miniature plastic coral…yes please, and even better if it’s painted in candy colors. You should know by now I’m all about the miniature things. The smaller the better.
Tuck your greenery into little pockets on the “floor.” Make it uneven…one big chunk, one small sprig, one patch with nothing at all. Our brains like variation, so give it what it wants.
Step 4: Choose Your Fish (The Main Characters)
This is where your jar stops being “pretty” and starts being alive (well, symbolically).
Go for tiny resin or plastic fish—goldfish, clownfish, even a seahorse or two. The weirder, the better. My friend once put a little UFO she found in it and it was hilariously adorable.
I once used a 2cm mermaid and no one’s ever let me live it down…in a good way.
Placement tips: tilt one slightly sideways, like it’s mid-turn. Have one “hide” partially behind a shell for mystery and fun. Use a dab of clear glue if you want them suspended mid-water so they stand upright. The other thing I do is use clear fishing line to tie around the fish then tie to the rocks or something to anchor them on the bottom. If the plastic fish you got are floaters, this keeps them suspended without just bobbing up at the top like dead fish.
Your jar is basically an underwater sitcom set now.
Step 5: Mixing the “Sea”
We’re not using just plain water here, we’re going for a dreamy, slow-moving ocean.
Pro tip: cover the bottom with resin so the sand and moss don’t shift (if you want!). Let it dry before adding the water.
Option 1 – Layered Liquid:
Half jar water + a drop of blue or green food coloring. Top with clear mineral oil, the oil floats above water, catching light in a soft shimmer.
Option 2 – Glycerin Sea:
Warm water + 1 tsp glycerin + color + optional glitter. Slows down movement so the “water” feels heavier, and more tranquil. I think this is what they used to use for snow globes when I was younger, it has the same look to it.
Option 3 – Frozen Sea:
Use craft resin to freeze your scene exactly as you want it. Holds more permanence if you are looking for consistency in your life.
Pour carefully down the side of the jar so you don’t disturb your little set. This is one of the most satisfying moments, watching liquid fill up around your scene without wrecking it.
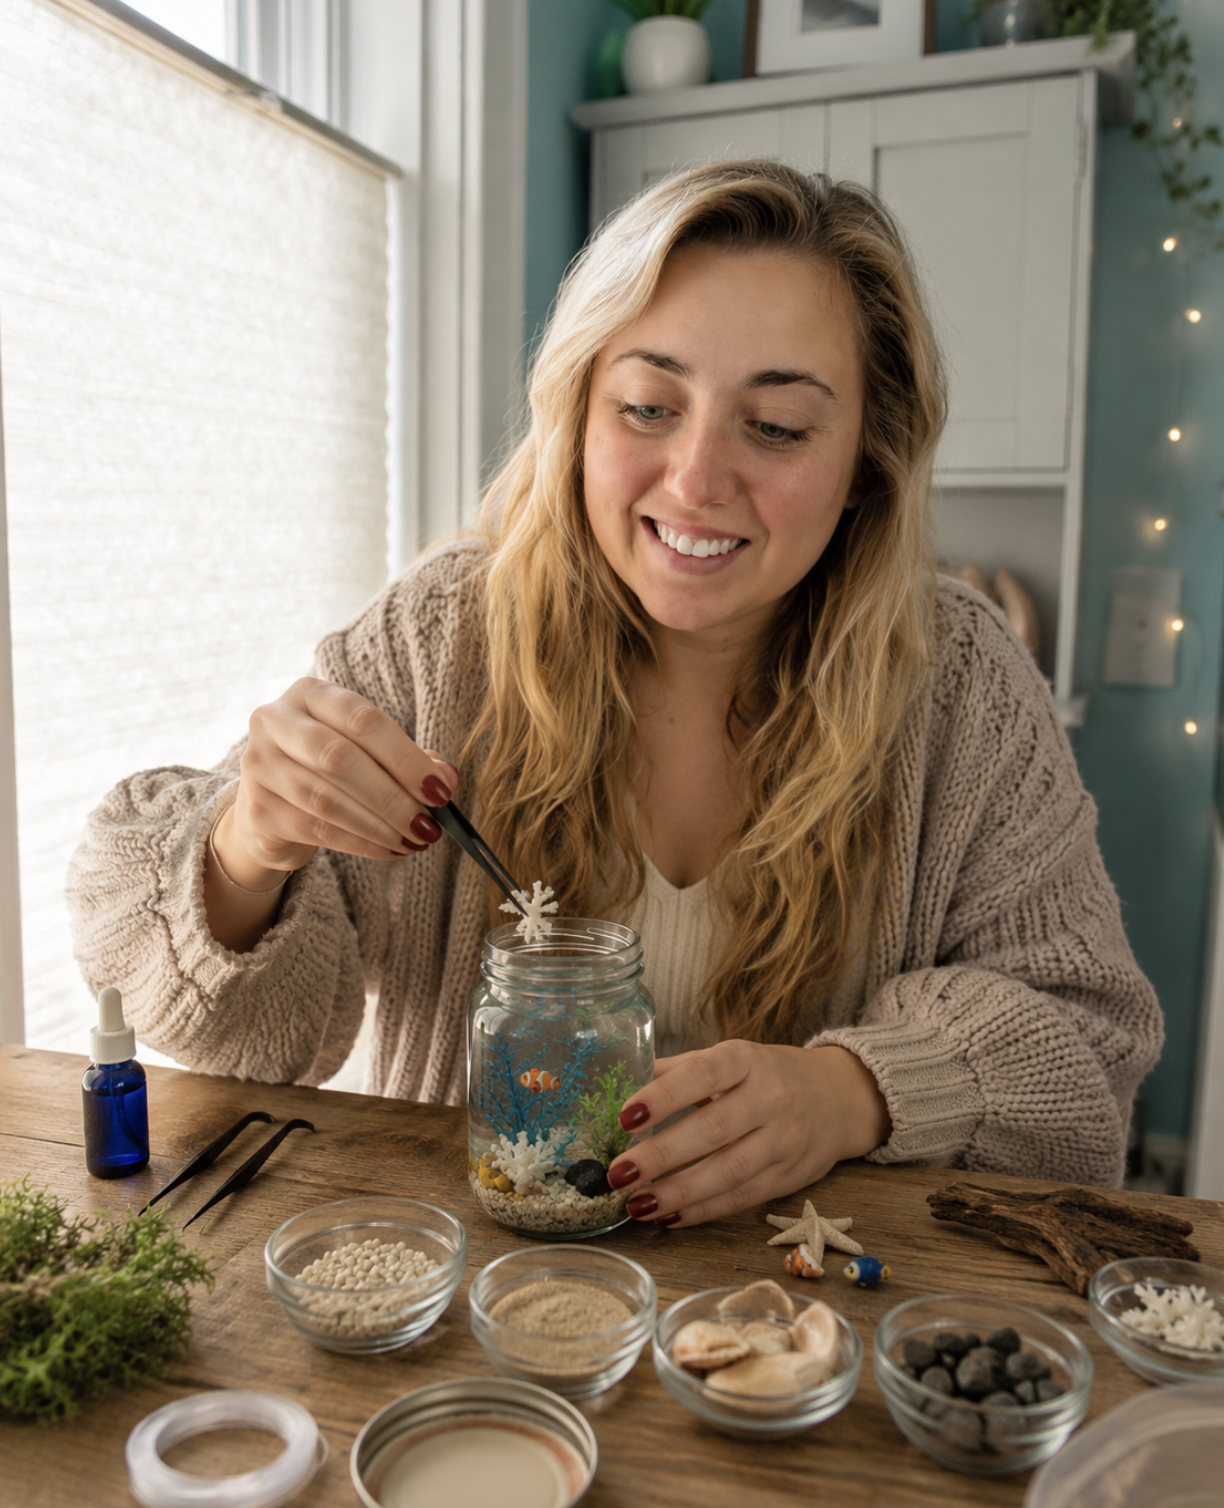
Step 6: A Hint of Magic Dust (Optional)
Glitter, mica powder, or even the tiniest pinch of iridescent eyeshadow can make the water sparkle like sunlight. The key here is less is more. You want shimmer, not a glitter bomb. Trust me on this, I learned my lesson the hard way.
Step 7: Seal and Style
Close your jar tightly. If you want, run a thin bead of glue around the lid for extra security.
Now…decorate the outside if you want too! Wrap the lid in twine and paint little wave crests along the glass bottom. Add a seashell charm dangling from the neck if you want. The possibilities are seriously endless and you might have better ideas than I do about them.
The exterior should feel like the cover of a book…you want people curious enough to “open” the story with their eyes.
Step 8: The First Tilt
Pick it up an slowly rotate it in your hands. Watch your fish “swim,” your glitter drift, and the liquids shift around in their new home. This is the dopamine drop, so I hope you enjoy it.
It’s a small ritual you can repeat every time you need to breathe slower.
Why This Works (The Mini Science Bit)
We love miniatures because they give us the thrill of mastery over a world…without the stress of actually running it.
Throw in slow-moving elements and gentle sparkle, and you’ve got a visual stim toy in a jar. Your brain says, “That’s nice, I want more of that,” and boom…dopamine!
There’s a “No Fish” version of this you can make too if those floating guys give you trouble and you’re struggling too much with the twice. It’s exactly what it sounds like, with shells, sand, and plants for a minimalist beach vibe.
I once made one with only white sand, one shell, and a single pearl bead…people thought it was art. By “people” I mean myself.
A sealed fish terrarium is a craft that really hits the dopamine hard. Dopamine hobbies are soul-settling activities that make you feel more control in life. They give you a sense of control and joy when you’re having a hard day. Your brain loves small wins, and making something useful from nothing is a delicious little victory. Don’t forget that dopamine is the “on the journey” drug, not the “everything is perfect” one. It’s the act of making that feels so nice for your brain, that’s what you should focus on.
It’s proof that you can create beauty with a jar, a few bits of plastic, and your imagination…and that sometimes, happiness fits in the palm of your hand.
Related Reads you Might Enjoy:
The Psychology of Tiny Things: Why We Love Miniatures, Dolls, and Dioramas
Make Plantable Seed Paper From Junk Mail: A Crafty Way to Grow Beauty from Trash
Soap Carving: The Gentle Art of Shaping Something Small and Sacred
The Cleanest Soap You’ve Never Heard Of: Soapnuts and the Science of Suds
Watercolor Painting: The Soft Art of Coming Back to Yourself
Feeling Worthless? Here’s Why the Odds of You Existing Are the Most Beautiful Miracle